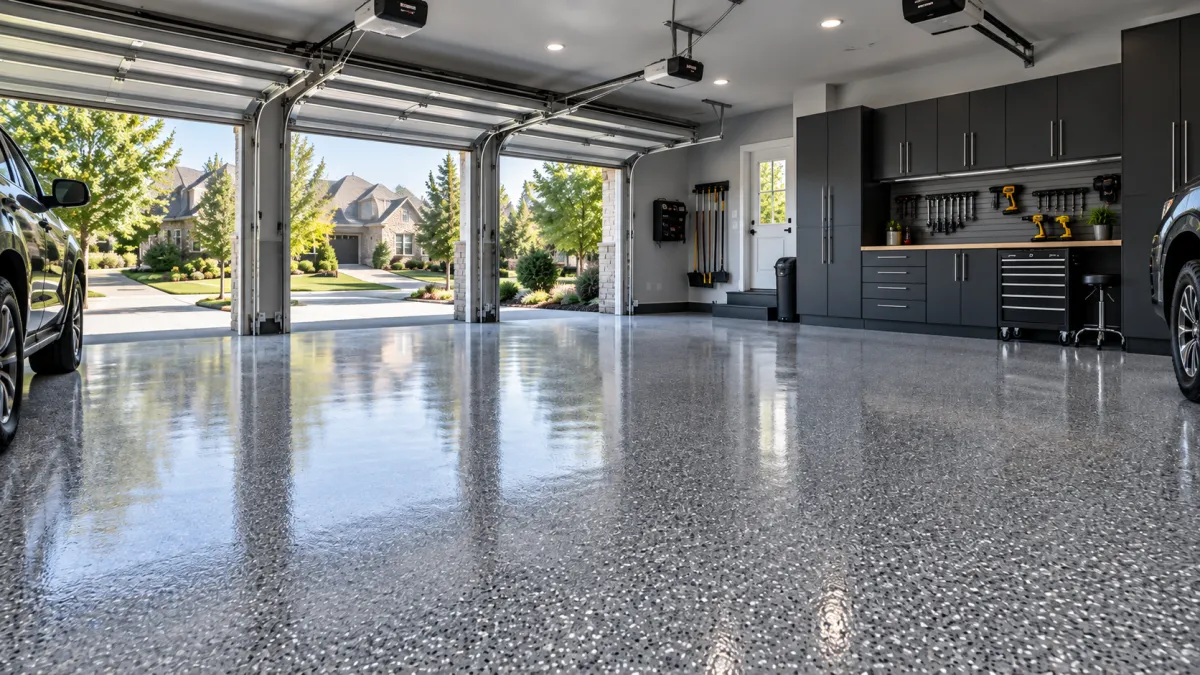
DIY vs Professional Epoxy Garage Floor: Is Paying a Pro Worth It?
Choosing between a DIY epoxy project and professional installation can feel like a simple budget decision. A retail kit may cost much less than hiring a contractor, but the price on the box does not tell the whole story. Homeowners also need to consider preparation, equipment, materials, garage downtime, and the possibility of having to repair the floor later.
For some homeowners, DIY epoxy is a practical way to improve a clean, stable garage floor. It can work well when you have enough time, understand the preparation process, and feel comfortable handling the coating according to the manufacturer’s instructions. For others, professional epoxy may be worth the additional cost because a trained team can assess the concrete, prepare the surface, and apply the system within its working window.
The right choice depends on more than appearance. This guide compares DIY and professional options based on slab condition, product quality, preparation equipment, durability, total cost, time, and risk. It also explains why a professional garage floor coating may involve several layers rather than one application of resin. By looking at the complete installation process instead of only the initial price, you can make a more confident decision about the best coating for your garage.

The visible finish is only one part of a garage floor coating project.
Compare the Project Before You Buy a Kit
Before choosing DIY kits or a professional installation, look beyond the advertised price. A realistic comparison should include the condition of the slab, the preparation method, the materials in the system, the expected cure time, and the amount of garage downtime. A basic diy kit may work for a clean, stable surface, while a more involved epoxy flooring project may require grinding, crack repair, moisture evaluation, multiple coats, and a protective topcoat.
A local estimate can help you understand what the job actually involves. Ask whether the review includes the garage floor condition, preparation requirements, proposed coating, installation schedule, product information, and warranty terms. This gives you a clearer way to compare the complete process with the cost and effort of doing the work yourself. An estimate is simply information and does not obligate you to hire the team.
Want a second opinion before buying a kit?
A local slab review can help you compare DIY costs with a realistic professional system.
Request a free estimate(502) 308-4272
What a DIY Project Actually Involves
The coating is only one part of the job. A DIY garage floor project begins with emptying the space, inspecting the concrete, gathering the right equipment, and planning enough time for each stage. The surface must be cleaned and prepared before the epoxy is mixed, applied, and protected while it cures. Depending on the slab, product instructions, temperature, and available equipment, the process can take several days rather than a single afternoon. A one-car garage may require different material quantities and working strategies than a larger two-car garage.
Completely emptying the garage so the entire floor is accessible.
Cleaning the concrete and removing dirt that could interfere with adhesion.
Removing oil, grease, tire residue, and other contamination from the surface.
Removing old coatings that are loose, incompatible, or already failing.
Repairing cracks and allowing patching materials to cure as directed.
Mechanically profiling or chemically preparing the concrete according to the coating manufacturer’s instructions.
Vacuuming thoroughly and controlling dust before the epoxy application begins.
Mixing the resin and hardener accurately without introducing unnecessary air.
Applying the coating within its limited work window before the material becomes difficult to spread.
Broadcasting flakes evenly if the selected epoxy system includes a decorative flake finish.
Removing excess flakes and smoothing rough areas before the next layer.
Applying the protective topcoat at the correct stage of the process.
Protecting the floor during cure and keeping people, pets, tools, and vehicles off it.
Each step affects the next one. A rushed cleaning or prep step can cause adhesion trouble, while poor crack repair may remain visible through the new finish. An incorrect mix, unsuitable weather, or missed work window can shorten the useful life of the coating. Before starting, confirm the manufacturer’s instructions for ventilation, protective equipment, recoat time, foot traffic, and vehicle return time. The floor may be walkable in a matter of hours, but vehicle traffic often requires longer curing.

Cleaning and preparation often take more time than applying the resin.
Why Preparation Matters More Than the Finish
For most homeowners, preparation is the hardest and most important part of a garage floor project. Epoxy cannot hide oil, weak concrete, dust, or moisture trapped beneath the coating. A slab may look clean and ready while still containing contaminants that prevent proper adhesion. Washing the surface removes loose dirt, but it does not always remove absorbed oil or create the profile needed for a durable bond.
The goal is not simply clean-looking bare concrete. The concrete pores must be open enough for the epoxy to grip the surface. A smooth or sealed slab may require diamond grinding or another manufacturer-approved method of profiling. Acid etching can be appropriate for some surfaces, but it is not automatically equivalent to diamond grinding and may not remove old coatings, embedded grease, or weak concrete. The correct prep method depends on the slab and the coating system.

Moisture testing can reveal vapor conditions that are not visible on the surface.
Professional crews often use commercial diamond grinders and dust-extraction equipment to make diamond grinding more consistent and control airborne particles. DIY homeowners can rent diamond grinders, but operating the equipment requires planning, appropriate safety gear, and careful dust management. A poor pass over one section of the floor can leave uneven areas that affect the finished coating.
Moisture testing is another essential part of prep. A slab can appear dry while moisture vapor continues moving through the concrete. The appropriate response depends on the test result, the coating manufacturer’s requirements, and whether the system includes a compatible moisture-mitigation product. Covering an actively wet slab without addressing the cause can increase the risk of blistering, peeling, or other coating failure. Preparation reduces risk, but it cannot correct structural movement or an ongoing water problem by itself.

Diamond grinding and dust extraction help create a more consistent surface for the coating.
DIY preparation versus professional preparation
Potential DIY advantages
Lower upfront labor cost when you already have the necessary skills.
Control over the project schedule and preparation sequence.
Useful hands-on experience for homeowners who understand concrete work and epoxy products.
Common DIY challenges
Renting, transporting, and operating diamond grinders correctly.
Managing dust, cleanup, equipment return deadlines, and disposal.
Finding hidden contamination, weak concrete, cracks, or moisture before coating.
DIY Kits and Professional Resin Systems Are Not Identical
“Epoxy” describes the resin chemistry, not necessarily the complete garage floor system. Basic DIY kits may combine resin, hardener, color, and flakes in one package, while professional flooring can include separate materials selected for the slab, expected traffic, and desired finish. A clean, stable surface may suit a quality diy kit, but a damaged or moisture-prone floor may need a more carefully designed system.
different resin solids or 100 solids formulations;
primers that improve bonding to the prepared surface;
thicker body coats for added build and coverage;
full flake broadcast for texture and appearance;
polyaspartic topcoats for specific cure, wear, or UV requirements;
moisture-mitigation products for qualifying slabs.
In plain language, a professional resin system may include a primer, base coat, decorative flake broadcast, grout coat, and protective topcoat. Sika’s professional flooring systems illustrate how multiple materials can be combined into layered epoxy, flake, and polyaspartic systems, although one manufacturer’s approach should not be treated as representative of every contractor. A single diy kit and a multilayer professional coating are not necessarily equivalent systems.

A retail DIY kit may contain fewer layers than a professionally specified coating system.
Some coatings are designed for faster installation, while others prioritize chemical resistance, appearance, UV stability, or heavy traffic. The term 100 solids means the material contains no solvent that evaporates during curing, but it does not guarantee that the floor will last longer. Application quality, surface preparation, thickness, cure conditions, and the suitability of the system still matter. A more expensive coating is not automatically better if it does not match the concrete or the way you use the garage.

The system may include more than one resin layer and a protective topcoat.
Where DIY Epoxy Can Save Money
Labor is a major part of professional installation. Contractors also account for vehicles, insurance, commercial equipment, maintenance, and specialized preparation tools. When a homeowner completes the work personally, a DIY project may reduce the upfront cost of a garage floor. However, the savings come from taking on the labor, planning, and risk—not from eliminating the costs of creating a durable epoxy surface.
Before buying a DIY kit, create separate budget lines for the coating, grinder rental, industrial vacuum, crack-repair materials, moisture testing, cleaning supplies, flakes, topcoat, protective equipment, disposal, and contingency funds. Include the value of your own time and any days when the garage cannot be used. For example, a kit that appears inexpensive may become a much larger project after adding equipment, preparation materials, transportation, and time away from other work. Compare that complete amount with a written quote for professional installation.
DIY can be reasonable when you have concrete-prep experience, can rent the right equipment, and can devote several days to the job. Sales, simpler color patterns, and buying materials in stages may lower the cost, but partial installation can create batch-matching or recoat complications. Follow the manufacturer’s instructions for storage, mixing, ventilation, and protective gear. A low-cost DIY project may save money today, but poor preparation could lead to repairs months later. The fairest comparison is the total cost of the DIY process versus the complete professional installation, not the shelf price of the kits alone.
Where DIY Becomes Expensive
The biggest risk in a DIY epoxy project is coating failure. Peeling, blistering, delamination, bubbling, tire pickup, discoloration, and premature wear can have different causes, including contamination, moisture, weak concrete, poor mixing, inadequate surface preparation, or traffic before the floor has cured. If the coating fails months later, the solution is not always to apply another coat over the damaged area.
Identify the cause of the failure.
Remove loose or failed resin, sometimes beyond the visibly damaged area.
Grind the concrete or use another approved removal method.
Repair the floor and prepare the bare concrete again.
Purchase and apply another coating system and topcoat.
Removing failed epoxy can be more difficult than preparing bare concrete correctly the first time. The garage may be unavailable for additional days or months, and hot tires, vehicle traffic, chemicals, or repeated cleaning can expose weak adhesion quickly. The correct repair depends on the failure, the coating system, and the condition of the floor, so avoid assuming that a new layer will solve every problem.
Failed coating may need mechanical removal before a new system can bond to the concrete.
Professional installation can reduce risk, but it is not automatically flawless. Slab movement, moisture, unsuitable materials, or workmanship issues can still cause failure. Ask how the contractor inspects the slab, prepares the surface, follows the system instructions, and documents the warranty. Proper preparation gives the epoxy a better chance of lasting for years, but no coating can eliminate every substrate or use-related risk.
Important: Calculate total cost as the original project plus equipment and labor, removal, replacement materials, and lost garage use. A low initial price is not the same as a low total cost.
What Are You Paying a Professional For?
Professional epoxy pricing includes more than the resin. You are paying for technical judgment, preparation equipment, scheduling, consistency, and accountability throughout the installation. A professional epoxy team can help identify problems before materials are placed on the floor, which may mean fewer surprises, cleaner edges, and less time spent correcting mistakes.
Experience assessing concrete
An experienced team can look for weak concrete, moisture, contamination, cracks, spalling, and incompatible coatings before work begins. This assessment helps determine whether the garage floor needs repairs, moisture testing, a primer, or a different epoxy system.
Commercial equipment
Commercial diamond grinders and dust-extraction systems can make diamond grinding more consistent and help control dust during prep. The right equipment can expose a sound surface and create better conditions for the coating to bond.
Timing and consistency
Fast-curing materials have short working windows. A trained team can mix, distribute, broadcast, and finish the materials efficiently, often completing critical stages in a coordinated sequence rather than working in small sections over several days.
Consistency matters when flakes must be spread evenly and edges must remain clean. A professional team may also coordinate crack repair, moisture testing, base chemistry, topcoat selection, and cure time. This coordination can be especially valuable when the epoxy system must be applied within specific recoat windows or kept free from traffic for several hours or longer.
Warranty protection
A legitimate professional installation should provide written protection for specific types of failure. Before hiring anyone, ask which preparation method will be used, whether moisture testing is included, how many coats are planned, which materials and topcoat will be applied, when vehicles can return, what maintenance is required, and which warranty exclusions apply. Warranty protection depends on written terms, proper substrate conditions, and following the care instructions. It does not automatically cover structural movement, new moisture, impact damage, or every coating problem.
Not sure what your slab needs?
502 Epoxy can review the garage condition and explain system options before you decide between DIY and professional installation.
Explore professional epoxy flooring
When DIY Is Reasonable and When a Pro Makes More Sense
The best choice depends on the condition of the slab, your preparation experience, the finish you want, your available time, and how much risk you are comfortable accepting. DIY can be a sensible option for a straightforward garage floor, but professional installation becomes more valuable when the surface or project expectations are more demanding.
DIY may be reasonable when:
The slab is stable, clean, and in good condition.
There are no major moisture or movement problems.
You have concrete-prep experience and understand the epoxy process.
You can rent and safely operate the required professional equipment.
You have a flexible schedule and can protect the garage during curing.
You are comfortable following resin chemistry, mixing, and application instructions.
Minor cosmetic imperfections will not bother you.
You are willing to accept the repair risk yourself if the coating fails.
Professional installation makes more sense when:
The garage is attached to your home and downtime or disruption matters.
The slab has moisture, movement, spalling, extensive cracks, or other damage.
There is an existing failed coating that must be removed.
You want a full-flake, metallic, or highly consistent decorative finish.
You need help selecting coatings for chemicals, vehicle traffic, or heavy use.
You have limited time and want the work completed in a coordinated schedule.
You want written warranty coverage with clearly stated conditions.
You do not want to manage grinding, dust control, repairs, or disposal.
The appearance and long-term finish matter as much as basic floor protection.
There is also a middle option. You can pay for a professional assessment, moisture evaluation, or surface preparation and then ask whether you may apply the epoxy yourself. Not every contractor will offer this arrangement, and the warranty may not apply, so confirm the responsibilities in writing before starting.
Homeowners in Prospect, Anchorage, Norton Commons, Indian Hills, and other Louisville-area communities may have different expectations for how a garage functions. A clean finish, even flakes, sharp edges, and a consistent topcoat can matter when the garage is used as a workshop, gym, storage area, or entertaining space. Those expectations do not change the technical standard for the floor; they simply affect whether DIY or professional work provides the better fit for the space and the years ahead.
Is Professional Garage Flooring Worth It?
Think about how you actually use the garage during a typical week. A garage floor that holds an occasional vehicle has different demands from one that functions as an active part of the home. Oil, water, sawdust, dropped tools, exercise equipment, cleaning chemicals, and frequent foot traffic can all affect the type of epoxy flooring and protective coating you need.
Workshops with tools, sawdust, and dropped equipment
Gyms with repeated foot traffic and exercise equipment
Storage rooms with rolling bins and shelving
Detailing spaces exposed to water and cleaning products
Entertainment spaces used for games and gatherings
Entrances into the house exposed to dirt and moisture
Show garages where appearance matters as much as protection
If the garage is simply an unfinished utility room that you rarely enter, a DIY garage floor may satisfy your goal. If you use the space for woodworking, games, exercise, or entertaining, professional epoxy may offer more value because a consistent finish is easier to live with and maintain. The right system should match the expected traffic, cleaning routine, appearance, and time you plan to spend in the space.
A decorative garage floor can improve cleanliness, comfort, and visual appeal, but it does not solve drainage, insulation, structural movement, or humidity problems. Consider the investment over several years: the value comes from how often the garage becomes a useful working or living space, not simply from having a glossy floor. Homeowners do not all need the same coating, and a more complex system is worthwhile only when it matches the way the garage is used.

The value of a floor depends partly on how often the garage becomes living or working space.
How to Compare Professional Quotes Correctly
Do not compare professional quotes by total price alone. Two estimates may describe very different epoxy systems, preparation steps, materials, cure times, and warranty terms. A lower number may exclude mechanical grinding, crack repair, a protective topcoat, moisture evaluation, cleanup, or other parts of the garage floor coating process.
Question | Quote A | Quote B |
Mechanical grinding? | ||
Crack repair? | ||
Moisture evaluation? | ||
Base chemistry? | ||
Full flake? | ||
UV-stable topcoat? | ||
Vehicle cure time? | ||
Adhesion warranty? |
Ask each professional installation company for written product names, the number of coats, preparation methods, moisture results, included repairs, cleanup responsibilities, payment schedule, and vehicle-return instructions. Confirm whether the quote covers the complete floor or only the coating application. Cure time can vary with the system, temperature, humidity, and slab conditions, so ask when foot traffic and vehicles can safely return, not simply how many hours the job takes.
Also ask what “UV-stable” means for the proposed topcoat. It may improve color retention, but it does not mean the floor is completely protected from fading. Likewise, an adhesion warranty may exclude structural movement, moisture, impact, chemicals, or improper maintenance. Comparing the written scope helps you evaluate the coating, system, and long-term value instead of choosing the cheapest line on the page.
Get a Professional Estimate Before You Decide
Our recommendation is simple: get a professional estimate before buying a DIY kit. Even if you eventually choose DIY, an inspection can help you understand the condition of the slab, preparation requirements, available epoxy systems, and realistic installation costs. That information gives you a practical baseline instead of asking you to guess from a product label or online price.
Before the visit, have the garage dimensions, intended use, existing coating history, moisture concerns, and preferred finish ready. Ask the professional team to explain the proposed surface preparation, materials, number of coats, cure schedule, maintenance expectations, and warranty terms. The estimate should describe the work and options clearly; it should not promise that one system is right for every floor unless the contractor has evaluated the space.
502 Epoxy provides free estimates throughout East Louisville and surrounding Jefferson, Oldham, and Shelby County communities. Confirm current service availability when you contact the company. A written estimate can help homeowners compare the time, cost, and repair risk of DIY with professional coating work, even if they are still deciding.

Professional preparation begins with an assessment of the existing slab.

A project discussion helps clarify the garage floor’s condition, intended use, and coating options.
Compare your options with a local estimate
Get practical guidance on preparation, materials, cure time, and the coating approach under consideration for your garage.
Visit 502epoxy.comCall/text (502) 308-4272
DIY vs Professional Epoxy Garage Floor: The Bottom Line
DIY vs professional epoxy garage floor decisions usually come down to slab condition, preparation skill, available time, and tolerance for risk. Choose DIY when the concrete is stable, moisture is not a concern, you have the right tools, and you can accept minor imperfections. A DIY coating can be a practical way to improve a garage when the project is straightforward and you are prepared to follow the manufacturer’s process carefully.
Professional installation makes more sense when preparation is uncertain, the floor has damage or an existing failed coating, appearance matters, or garage downtime must be limited. Professional work may also provide useful written warranty terms, although no coating can prevent every problem caused by moisture, structural movement, improper maintenance, or heavy use.
Compare the complete cost rather than the kit price alone. Include equipment, materials, repairs, disposal, your time, lost garage use, and the risk of having to remove and replace the coating months later. A system that is done right has a better chance of performing for years, but the right choice still depends on how you use the space.
For homeowners in East Louisville and nearby communities, 502 Epoxy can help you compare practical options. A professional estimate can provide a useful baseline without obligating you to hire the company. Before deciding, compare the slab condition and request a written scope of work that explains the preparation, coating system, cure schedule, and total cost.
